Format Usb Drive Mac For Windows
If you’re lucky, you can just right-click each partition on the Mac drive and select Delete Volume to remove the partitions. You can then right-click in the empty space and select New Simple Volume to create a partition and format it with the Windows NTFS or FAT32 file systems. The Mac drive may have an “EFI System Partition” on it.
How to Check a Drive’s File System RELATED: So how do you know if your USB drive is? You don’t need to do anything special with Disk Utility–just plug in your USB drive and open the Finder. Right-click or Control-click the drive’s icon in the Finder’s sidebar (or on your desktop) and select “Get Info.” You’ll see the drive’s file system displayed to the right of “Format” under the General heading. In the screenshot below, the drive is formatted with the exFAT file system.
Mac os x lion free download for macbook. How to Format a Drive on a Mac If you want to use a different file system on your USB drive, you’ll need to “format” it. Again, formatting a drive will erase it completely, so make sure you have everything backed up that you want to keep.
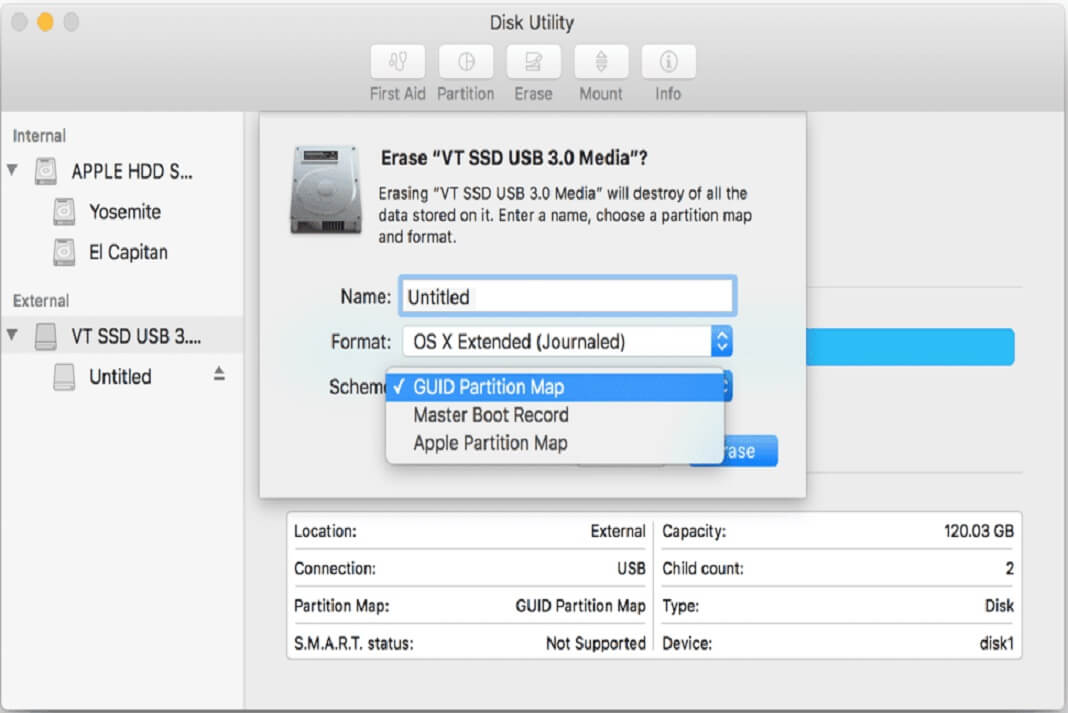
To format a drive on a Mac, you’ll need the built-in Disk Utility application. Press Command+Space to open the Spotlight search dialog, type “Disk Utility”, and press “Enter” to launch the app. You can also open a Finder window, select “Applications” in the sidebar, and head to Utilities > Disk Utility. Your connected drives will appear under “External” in the Disk Utility’s sidebar. Select the drive by clicking its name. Click the “Erase” button after selecting the entire drive to erase the entire drive and create a single partition on it.
You’ll be asked to provide a name for the disk, which will appear and identify the disk when you connect it to a Mac, PC, or another device. You’ll need to choose between several file systems: RELATED: • OS X Extended (Journaled): This is the default, but it’s only natively supported on Macs. It’s also known as HFS+. This file system is necessary if you plan on using the drive for Time Machine backups–otherwise, you’ll want to use exFAT for maximum compatibility. • OS X Extended (Case-sensitive, Journaled): On a case-sensitive file system, “file” is different from “File”. By default, Mac OS X doesn’t use a case-sensitive file system. This option exists because it matches the traditional behavior of UNIX and some people might need it–don’t select this unless you know you need it for some reason.
• OS X Extended (Journaled, Encrypted): This is the same as the standard OS X Extended file system, but with encryption. You’ll have to enter a password, and you’ll need to provide that password whenever you connect your drive to your Mac. • OS X Extended (Case-sensitive, Journaled, Encrypted): This is the same as the standard OS X Extended (Case-senstiive) file system, but with encryption. • MS-DOS (FAT): This is the most widely compatible file system, but it has some limitations–for example, files can only be 4GB or less in size each. Avoid this file system unless you have a device that requires FAT32.
• ExFAT:, but doesn’t have the limitations. You should use this file system if you may share the drive with Windows PCs and other devices like the PlayStation 4 and Xbox One consoles. ExFAT is the ideal cross-platform file system. It’s not natively supported on many Linux distributions, but you can.