Filezilla For Mac Instructions
This tutorial covers the following topics: • • • In this part of our FileZilla tutorial we will show you how to install the FTP client on the three most popular operating systems: Windows, Linux and Mac OS. Before proceeding with the FileZilla installation we should download the corresponding package from the. FileZilla installation on Windows The FileZilla installation on the Windows OS is quite simple.
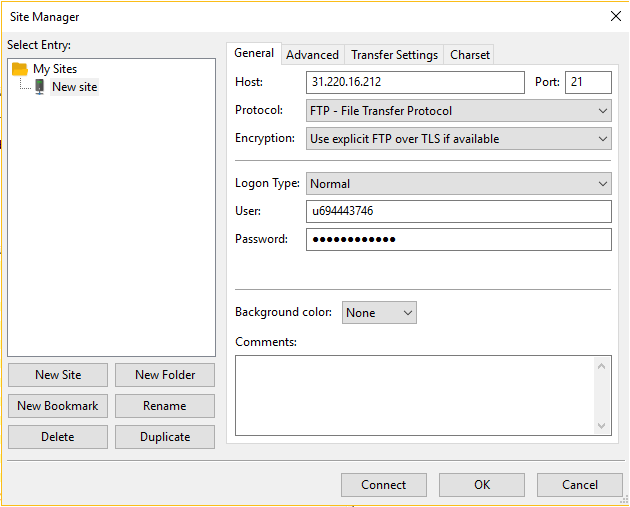
This article provides instructions for configuring the FileZilla FTP client to work with Egnyte, adding filters, and more. For background information about uploading files using FTP, and access to other FTP configuration guides, please read this article.
Log in your Windows software with an administrator account. After the download of the correct package (the.exe extension package is recommended) click on it. The License Agreement screen will appear. Press the I Agree button. On the next screen you should decide whether every user of the OS can work with the FTP client or it is allowed only for the admin account. Click on the Next button to proceed.
Select the components which you want to install. When ready - click on the Next button.
The next window allows you to set the destination folder for the FileZilla installation. Choose the desired folder and press the Next button. After that you should choose the Start Menu folder and click on the Install button. The installation should be completed in a few minutes. You can leave the Start FileZilla now check box checked and click on the Finish button. This will start your FileZilla FTP client. FileZilla installation on Linux In this section we will inform you how to install FileZilla on the most popular Linux distributions - Ubuntu and Fedora.
Both the distributions allow the FileZilla software to be installed through their package managers. In Ubuntu open a terminal window, log as the root user and execute the following command. Yum - y install filezilla FileZilla installation on Mac OS Basically the installation of the FileZilla software on a Mac OS can be completed in several steps. First you need to download the installation package of FileZilla from the. When you open the above URL, click the file designated for the processor in your computer. In case the installation does not start automatically, locate the FileZilla_[version number]_tar.bz2 file on your computer and double-click on it.
Following the installation instructions, you will be asked to agree to FileZilla's general public license, then choose options and a location for your FileZilla files. When you have completed the last step, click the ' Install' button to install FileZilla on your computer.
When installation is complete, click the ' Close' button. Best broadcast software for mac.